
1. Find the Task and Request to Join
📍 Where you are: Client 1/5 — ① Find · request → ② Workspace · data → ③ Readiness check → ④ Join → ⑤ Wrap-up
Screen: Registry (Console or Studio) · Other side: the Owner approves this request in Owner Track ch. 5
🎯 What you do in this step: Find the Task to join in the Registry, check in the README what the Task does and what data it requires, then request to join. If you join a Task whose data you cannot match, you get blocked at the check in chapter 3. So reading the README before requesting is the Client’s first job.
- 1) Find the Task
- 2) Read the README — check the conditions to join
- 3) Request to join
- ⚙️ Explained — the Owner decided how joining works
- ✅ Checklist
- Next
1) Find the Task
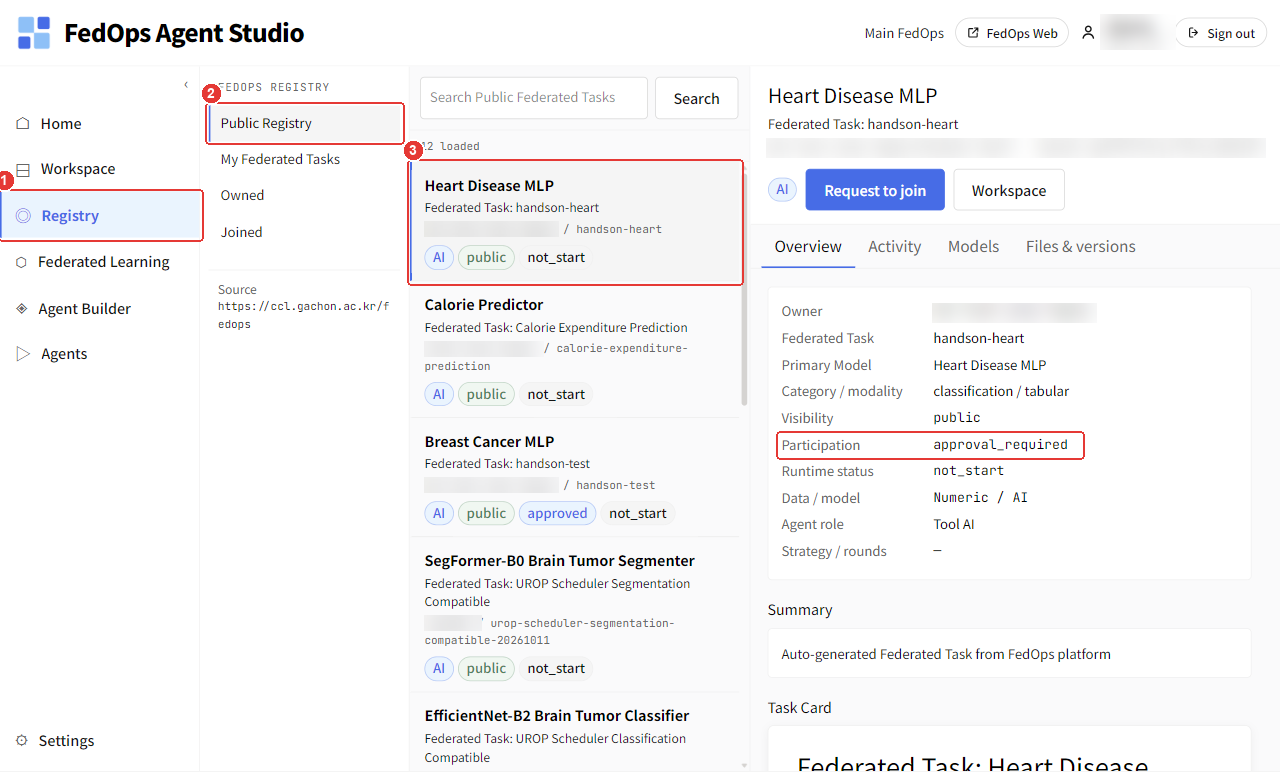
- Click Registry in the Agent Studio left menu.
- Choose Public Registry.
- Click the Heart Disease MLP card. The card title is not the Task name (
handson-heart) but the model name. Below the card, the Owner and Task name appear together as<Owner handle> / handson-heart.
Clicking the card opens the Task information on the right. If Participation is approval_required, the Task needs Owner approval. The same card is also visible in Registry in the top menu of the FedOps Console (web).
2) Read the README — check the conditions to join
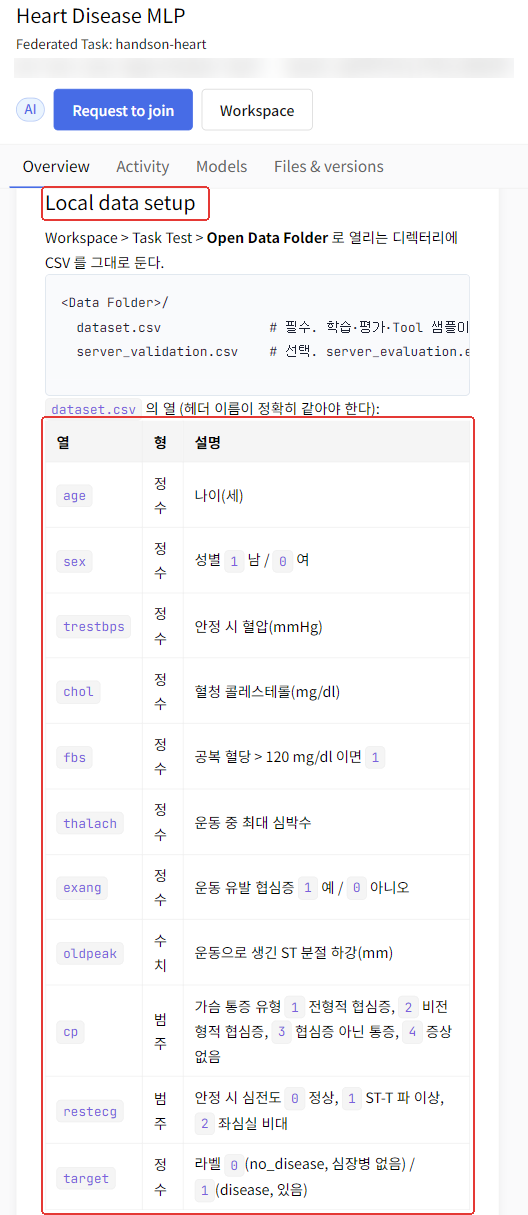
Scroll down the Task information on the right to see the README the Owner wrote, on the Task Card. Check the following before joining.
| What to look for in the README | For this Task | Why |
|---|---|---|
| Intended use | No disease / disease classification, for education | You need to know what you are adding your data to |
| Local data setup (data format) | One CSV dataset.csv, 10 columns (age … oldpeak, with cp and restecg limited to fixed values) + target (0/1) | Your data must be in this format to join |
| Federated participation | Joining procedure, at least 3 rows per class | Check that your data meets the conditions |
| Limitations | Not for diagnosis, accuracy around 0.75–0.8 | |
| Privacy | Data does not leave the PC | Check what is shared |
The Cleveland data in this tutorial comes from the same UCI original, so the format matches. In real life, this is the step where you check whether your hospital’s records match these column names and values.
3) Request to join
Do it in only one place. The result is the same.
| Where | How |
|---|---|
| FedOps Console (web) | Registry → Task card → Federated Learning join button |
| Agent Studio | Left menu Registry → Public Registry → select the Task → Request to join |
This is the request screen in Agent Studio.
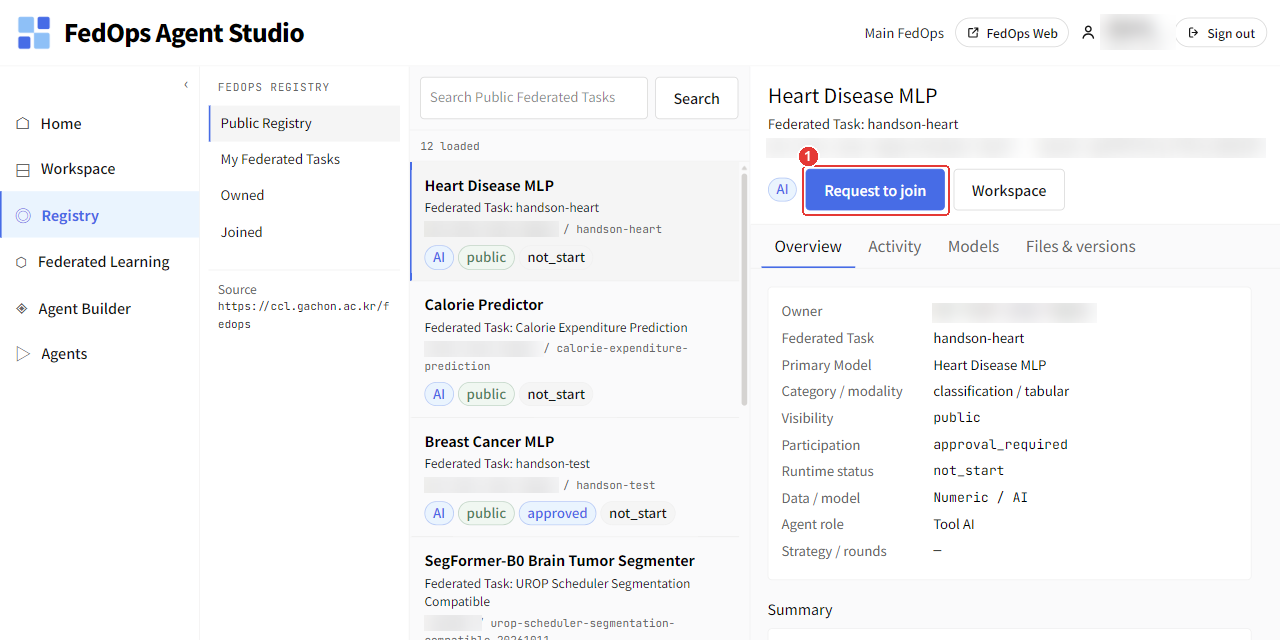
- Click Request to join at the top right.
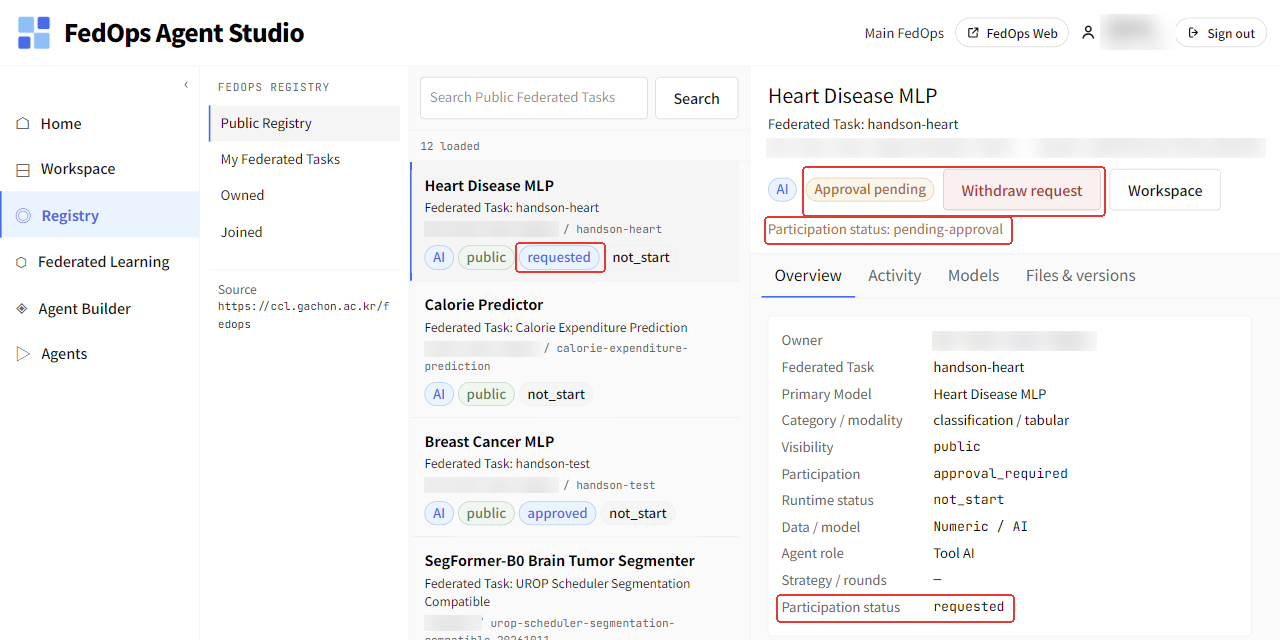
The button area changes to Approval pending and Withdraw request (cancel the request), and Participation status: pending-approval appears. The card on the left also gets requested. You stay in this waiting state until the Owner approves, and meanwhile you cannot bring the Task into a Workspace.
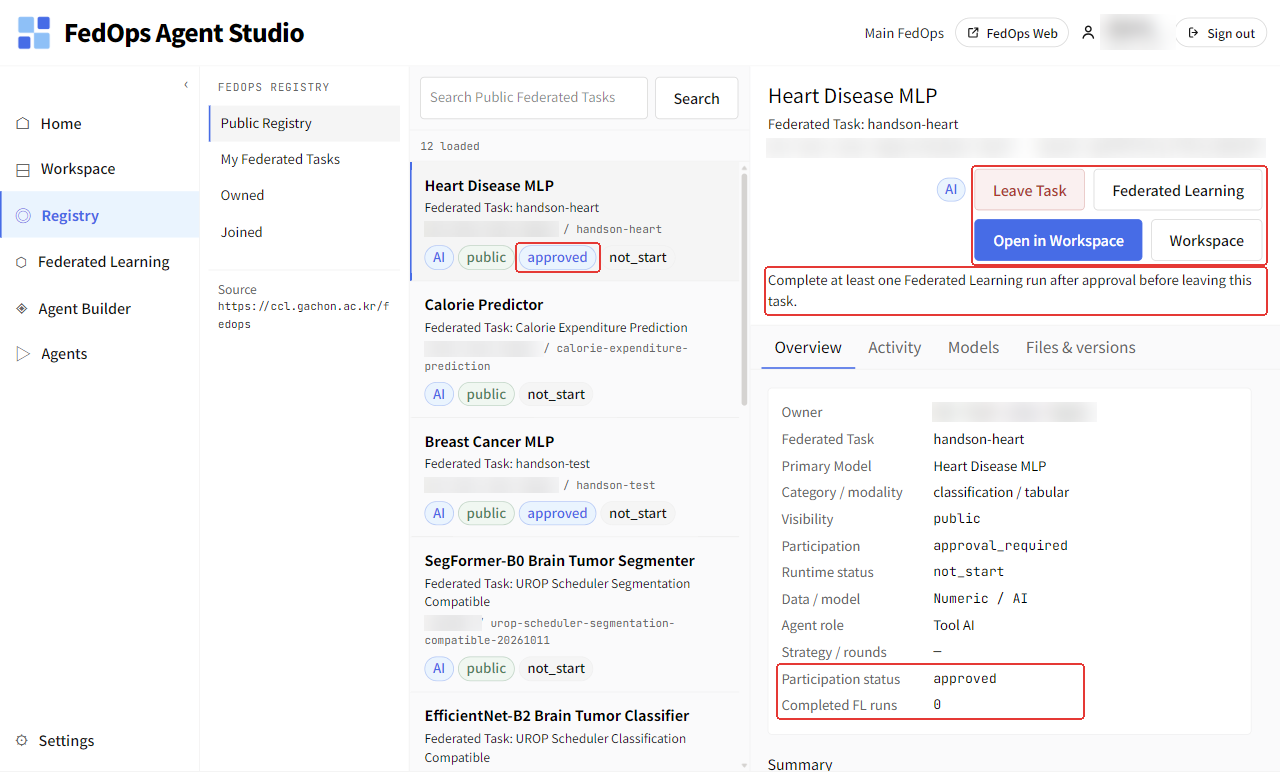
When the Owner approves, the card changes to approved and the buttons change to Leave Task · Federated Learning · Open in Workspace. The Overview below also shows Participation status: approved and Completed FL runs: 0. “Complete at least one Federated Learning run after approval before leaving this task.” at the top means you can leave this Task only after completing at least one run.
Tell the Owner you sent the request, and move on to chapter 2 once approved.
⚙️ Explained — the Owner decided how joining works
| The Task’s Participation setting | What you experience |
|---|---|
Owner approval required (this tutorial) | Request → wait for Owner approval → can join |
Open (automatic approval) | Can join right after requesting |
📚 Federated learning background — what is shared when you join
| Shared | Not shared |
|---|---|
| Model parameters trained on my PC (every round) | My data file, each individual patient record |
| The row count of my data (used as the FedAvg weight) | Where my data is stored, PC information |
| Evaluation metrics I allow (accuracy, etc.) | |
| My account handle, participation record |
Even sending only parameters, attacks that infer some properties of the training data are known to be possible in theory. When joining with sensitive real data, check your institution’s security policy first.
✅ Checklist
- You found the Task in the Registry
- You checked that the README’s data format matches your data
- You requested to join and got the Owner’s approval